Sending your first message
We’ll also talk a little bit about best practices for building the best message, some examples of good use cases, and some tips for measuring success.
In this topic:
Creating a new push message
If you’d prefer to test this process outside of your live Localytics instance, feel free to log in to our demo dashboard and follow along.
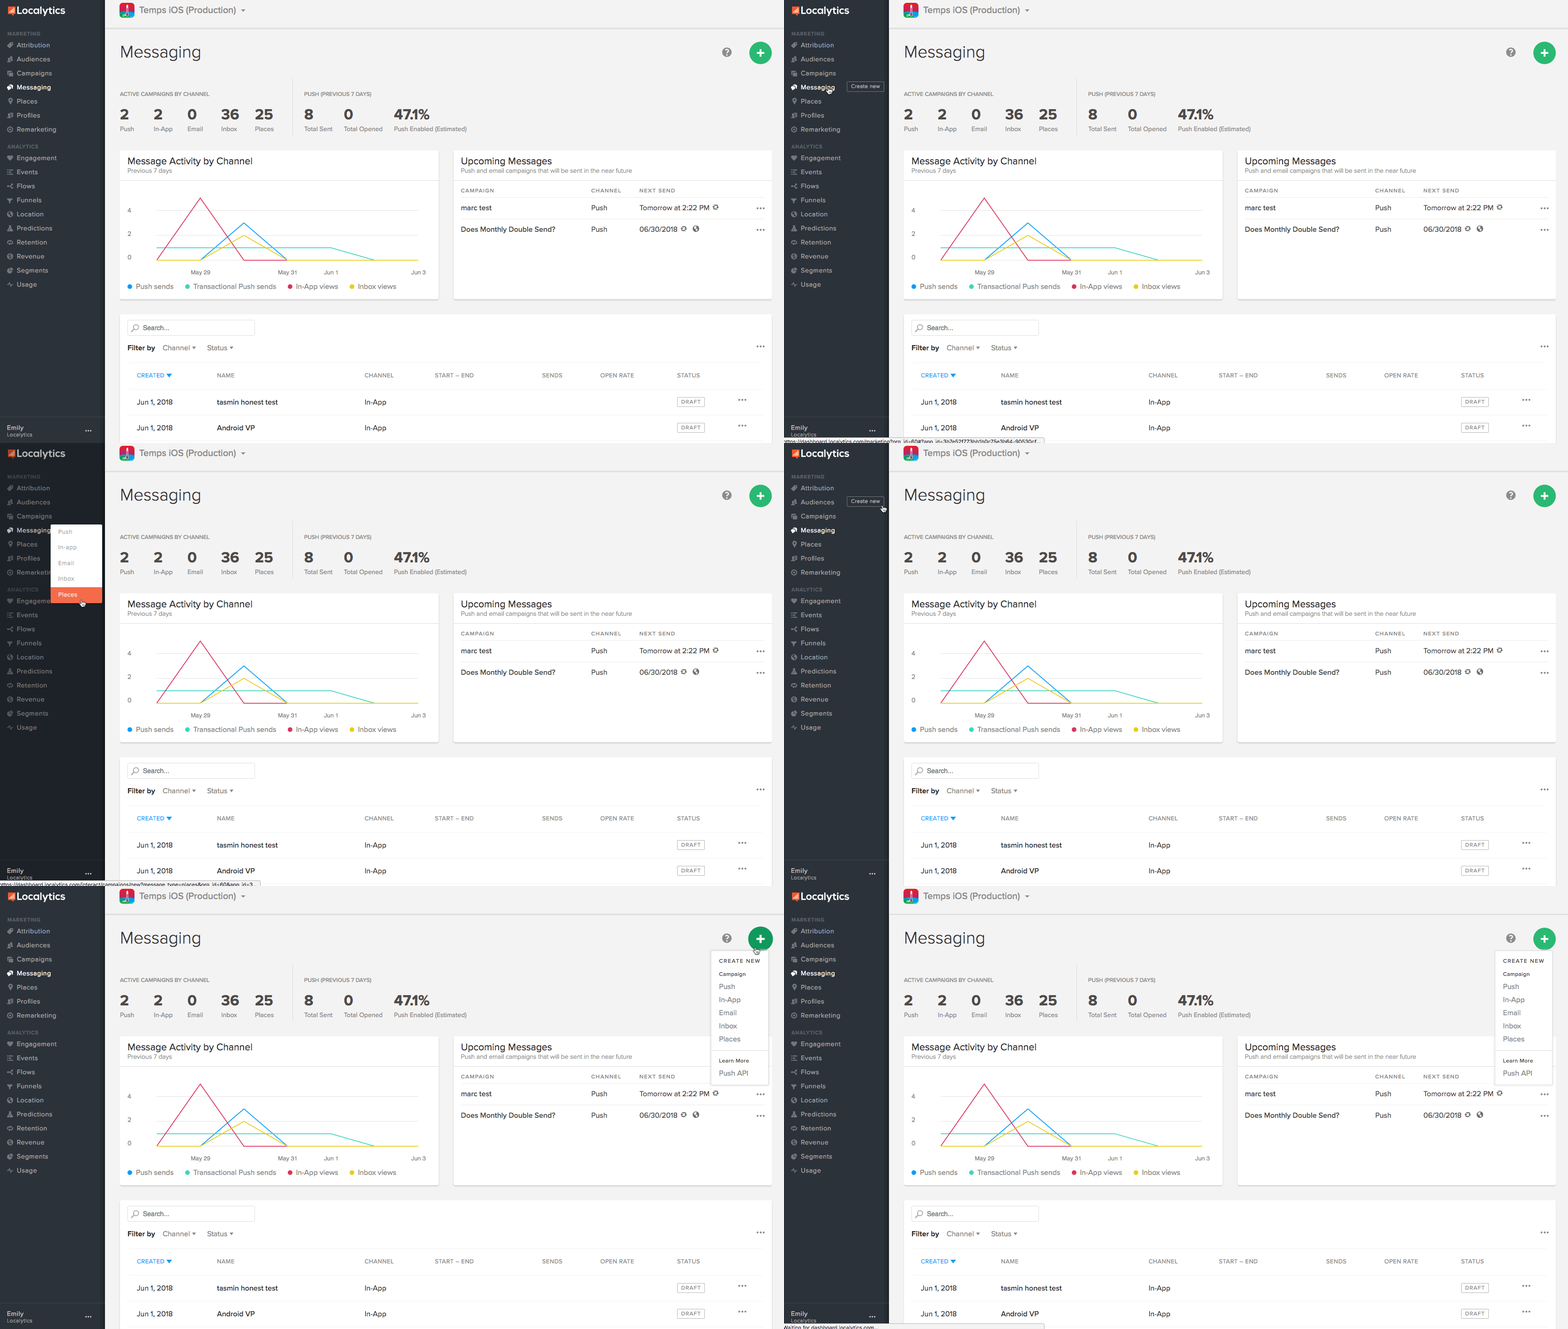
- Go to Marketing in the left pane and select Messaging.
-
To create a new message, select Create new in the left pane or select the green
 button in the upper-right corner.
- Select Push to create a push message.
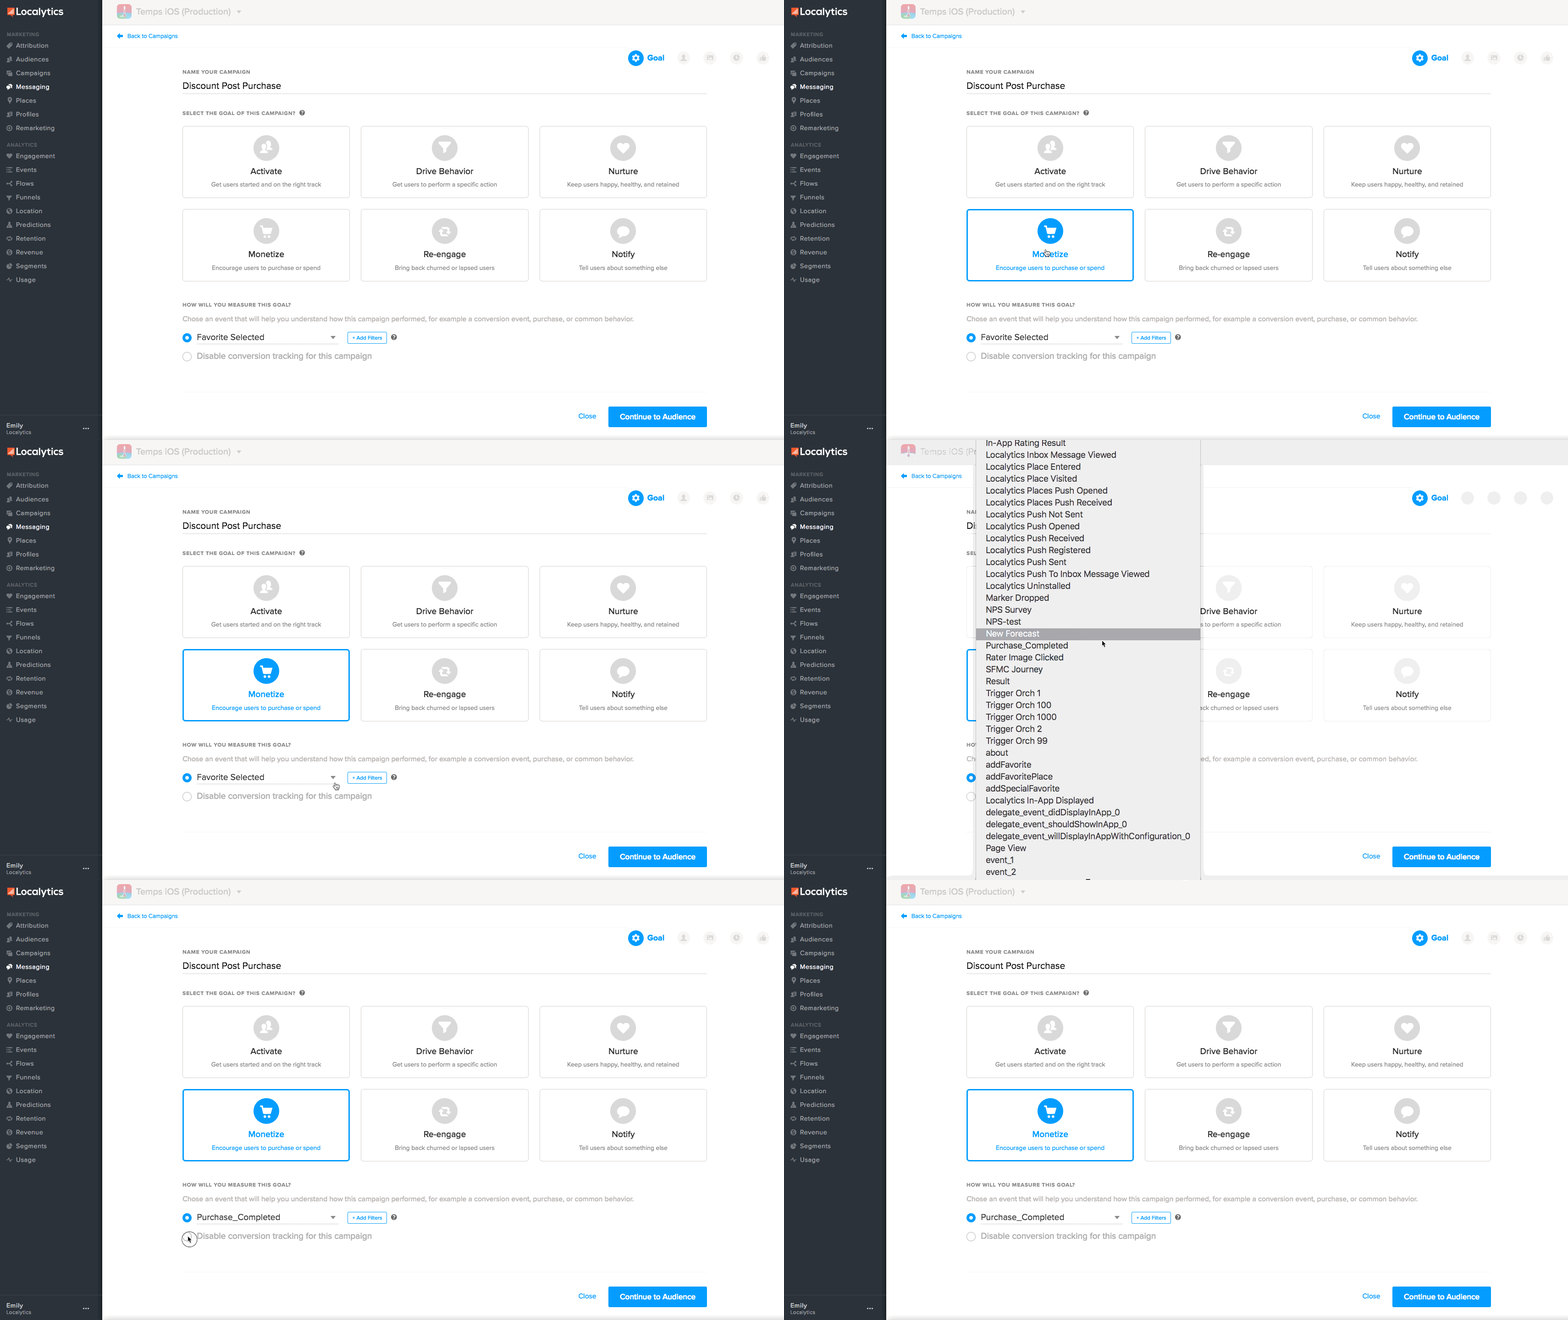
- Enter a name for your message. Make sure you pick something descriptive, so you can easily find it for data analysis in the future.
-
After you’ve named your message, select the goal: Activate, Drive Behavior, Nurture, Monetize, Re-engage, or Notify.
Different goals will surface different metrics within the analytics dashboard for the campaign. Make sure you pick a goal that aligns closest to your company goals for the campaign. For details, see Setting a messaging goal.
-
Next, choose how the goal is measured:
- We measure goal success by events (such as product viewed, checkout completed), so if your events are tagged in your app, select an event from the drop-down list.
- If you don’t have any events tagged yet, select Disable conversion tracking for this message.

Note: Want to know more about events? We won’t get into that in this quick tutorial, so for more information, see Events.
-
After you’ve chosen a goal, select Continue to Audience.

-
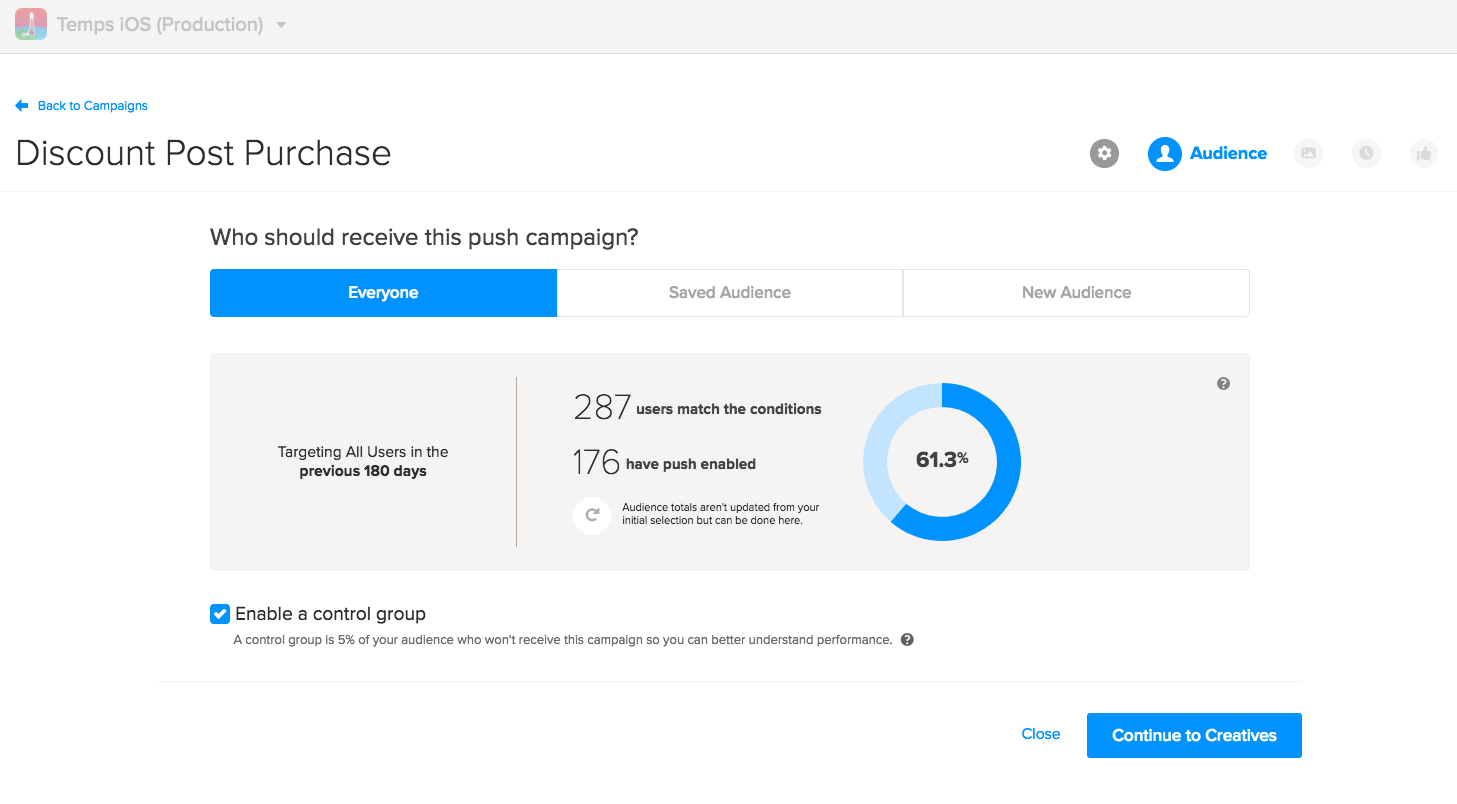
Here you’ll have three choices—send to everyone, send to a previously saved audience, or build a new audience to send the message to. We won’t walk through setting up an audience in this tutorial, but you can watch this short video for a quick overview.
For more information, see Audiences.
Note: You’ll have the option to schedule your message based on time zone later. This way, your broadcast message won’t arrive for your European audience at midnight.
-
If this is your first message (and you want to start with something simple), we recommend selecting Everyone to send out a message to all of your users. We call this type of communication a broadcast message.
We’ll talk a little more about segmentation later, but we recommend starting your messaging efforts by casting a wide net. This way you’ll get some solid baseline metrics and start to see the future benefit of targeted messaging campaigns.
- After you've select an audience, select Continue to Creatives, where you will build your message.
Adding message copy
Now it’s time to build your actual push message!
- We recommend entering an optional name for your message, so you can access the push message by this name in the future, differentiate between creatives (if you’re A/B testing), and use the name as an event attribute when creating an audience in the future. Use the optional name to label the push message without compromising the copy.
-
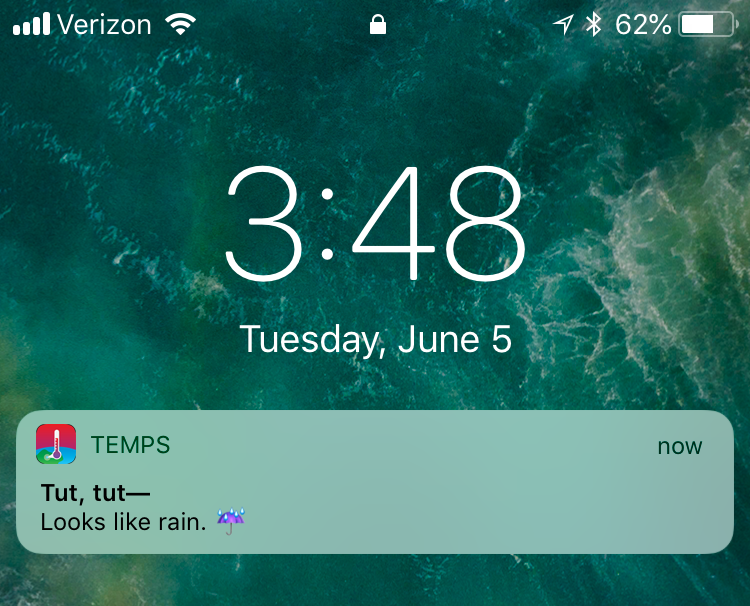
When it comes to building the message copy, you can do a lot of different things. Short and sweet is always best, but you can supplement your copy with images (or videos and gifs on iOS) and emojis. Figure out your goal—whether that’s awareness, sales, or interactions—and enter your message body copy as quickly as possible.
We’ve found companies that use 10 or fewer words in their push copy get better click-through rates.
It’s also important to think about timing. We’ll talk about scheduling in the next section, but think about what your user is doing when they receive your message. Are they on their lunch break? Having their first cup of coffee? Sleeping?
Context—in every sense of the word—is key when it comes to messaging. Push notifications can often be seen as intrusions—so aim to make your copy (and your timing) as unobtrusive as you can. Give your users something of value when you message them. That can be as small as a slight chuckle or as big as a free item at checkout.
A/B testing
If you’re not yet sure about what kind of copy your users respond to best, you can always do some A/B testing.
-
Select Add Creative in the left sidebar to generate a second (B) message for testing.

-
Build the B message: at a minimum, enter an optional name and message body.
You can see your changes immediately in the B message on the left sidebar. .
Note: In an A/B test, you send two different pieces of copy—and see which one performs better. Be sure to include a control group. The control group will help you to understand how your users react if they’re not messaged at all.
After you’ve crafted your message—and added any rich push elements (gifs, images, or videos)—it’s time to schedule the message.
- Select Continue to Scheduling.
Scheduling the message
The timing of your message is key—you wouldn’t want to inform users of a flash shoe sale at 3:00 in the morning.
We’ve found that the highest level of engagement and conversion (that is, click-through) occurs around the middle of the day—anywhere between 11 AM and 3 PM. The next best time is right before bedtime for most folks—between 9 PM and midnight.

You can schedule your message to be sent once or multiple times, on a recurring basis.
Scheduling a one-time message
-
Select One Time, and then specify the schedule:
- Send Now: Send the message to all recipients in your audience as soon as it is activated—regardless of time zone.
Make sure you’re deliberate and thoughtful with this option. Over-messaging your users (especially at times they’re not using their devices) could drive them to turn off notifications.
-
Schedule: Send the message at the date and time you specify.
We recommend that you specify the same time for all users if your audience is in a single time zone; otherwise, schedule the message based on time zone.
Note: For One Time - Schedule, you have the option to select a starting time zone (Beginning with users in timezone), which sets the time zone where the message kicks off. Ideally, this is the International Date Line, but you might need to change this if your use case calls for it.
Example: You’re launching a new app update from the United States. You don’t want to message your users in Europe before the launch, so it would be a good idea to shift Beginning with users in time zone to your US headquarters.
-
Personalize Delivery Time: Send the message on the date you specify at the optimal time for each recipient, based on user activity.
- Send Now: Send the message to all recipients in your audience as soon as it is activated—regardless of time zone.
-
In the Advanced Delivery Options section, you can use push throttling to control rate of push message sends, thus spreading the load over your servers. For more information, see Push throttling.
- When you are done, select Continue and Confirm.
Scheduling a recurring message
-
Select Recurring to send the message more than once at the cadence (every day, every other day, weekly, or monthly) you specify. You can deliver the message in the user’s local time zone, or send it out at the same time for everyone.
You also have the option to cap the frequency with which the message is sent. To avoid overwhelming your users, you can limit the message to:
- Send only one message per device
-
Allow multiple messages per device, but limit the frequency (for example, only two messages every seven days)
Note: For Recurring schedules, you have the option to select a starting time zone (Beginning with users in timezone), which sets the time zone where the message kicks off. Ideally, this is the International Date Line, but you might need to change this if your use case calls for it.
Example: You’re launching a new app update from the United States. You don’t want to message your users in Europe before the launch, so it would be a good idea to shift Beginning with users in time zone to your US headquarters.
- In the Advanced Delivery Options section, you can use push throttling to control rate of push message sends, thus spreading the load over your servers. For more information, see Push throttling.
- When you are done, select Continue and Confirm.
Sending your message
Once you’ve chosen a goal, picked your audience, built the message, and scheduled it—you're finally ready to send it out to the world!
-
Review your message summary carefully.

- Make sure you’ve set your goals properly, chosen the right audience, spelled everything correctly in your message, and scheduled it exactly how you’d like.
Note: If you don’t see a Test On Device button on the Confirm page, your SDK integration was completed without this option. You’ll need to ask your developers to set up test mode following the iOS, Android, or React guides.
-
When you’re confident the message is ready for its debut, select the green Activate button and throw yourself a little party at your desk. You sent your first message with Localytics!
